Test
in that I spent half an hour writing something to have it eaten by the internet. here is an attempt.
posted by E at 5:38 PM
8 comments
![]()
All are welcome in the Little Yellow House.
posted by E at 5:38 PM
8 comments
![]()
posted by Sean at 1:39 PM
1 comments
![]()
posted by V at 11:02 PM
3 comments
![]()
posted by Sean at 12:16 PM
3 comments
![]()
posted by Sean at 10:41 PM
3 comments
![]()
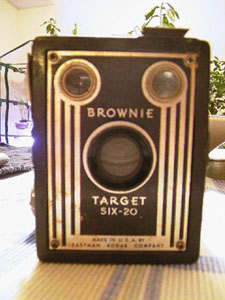
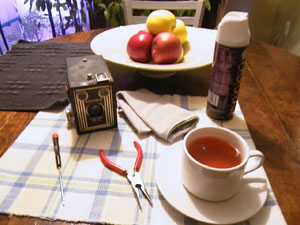 The cup of tea is not optional. Jasmin sweetened with honey is recommended, but Earl Grey should form a nice substitute. This may come as a shock to those who are familiar with the author, but in no case should you drink coffee while performing the following. Now, take some time to admire the details of the instrument you are about to perform surgery upon.
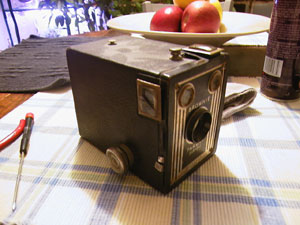
 All done? Good. Now you will need to loose the catch on top after pulling out the winding knob. This will allow you to pull the body of the camera from its shell, resulting in something like this:
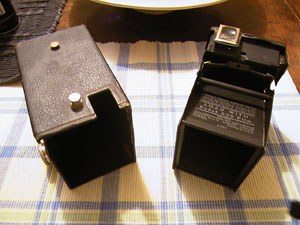 Have a few sips of tea while you admire the mechanical beauty you have exposed. Go ahead, the Internet can wait.
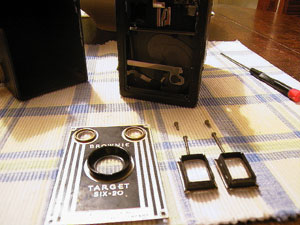 At this point you will want to go to town with the cleaner of your choice on the viewfinders, their mirrors, the lens, and the interior of the body. An electronic equipment cleaner and a microfiber cloth was used for this treatise, but to be very clear, it is contraindicated to use paper towels and water. You should not expend too much effort on cleaning the camera, since the particles floating about inside add a certain patina to your shots, which, after all, is the reason you use an old box camera, right? Right.
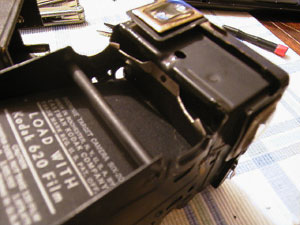 Now, take a close look at the top of the body where the supply of film is stored. It is here that some serious work will commence. Kodak, in its infinite wisdom, invented the 620 film format to replace the 120 format in common use back in the early 20th century. As with the Betamax, however, creating a better product did not ensure its longevity, and the 620 format went the way of the dodo while 120 remains available to this day. The difference between these formats is highly debated by photophiles with more time on their hands than the author, suffice it to say that 120 is a few millimeters greater in diameter and length.
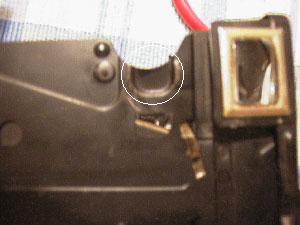 Using a clamp you will attempt to flatten out this dent. If your clamps are substandard as the author's were, this attempt will only slightly enlarge the total space for your film. To get the extra distance you will need to saw the ends of the film off in a dark place (or not, it shouldn't introduce too much light to the film). One caveat: you should not perform the sawing over one of your kitchen placemats. In creating this article, this produced a hole in said placemat and a, thankfully, bemused spouse, but you may not find yourself as lucky as the author. When you are all finished, your workspace may or may not resemble this:
 Photos taken using this newly-modified machine to follow. Cheers!
posted by Sean at 11:32 PM
2 comments
![]()
posted by Sean at 9:59 AM
0 comments
![]()
posted by Sean at 9:03 PM
2 comments
![]()

To add links, shoot me an email. ~Sean